audiboy
Hail the power of Quattro
Disclaimer: This is very long, but I feel that it's a thorough write up that I owe to Autogeek for supplying me some great products free of charge.
I decided that my A4 needed some attention today after the last few weeks of a ton of driving and harsh conditions I put her through. In the last three weeks I put over 3,000 miles on her and tracked her on a road course up in Michigan. I thought it would also be a great opportunity to write up a review on the Pinnacle XMT Series products that I won from the Autogeek contest. My car is generally well cared for, as are most of the owners vehicles on here, so I won't be reviewing the Ultra Fine Swirl Remover (Step 1) because I am going from the Fine Swirl Remover (Step 2) straight to the Carnauba Finishing Glaze. I will also not be reviewing the Intermediate Swirl Remover (Step 3) because my paint does not require that much correction.
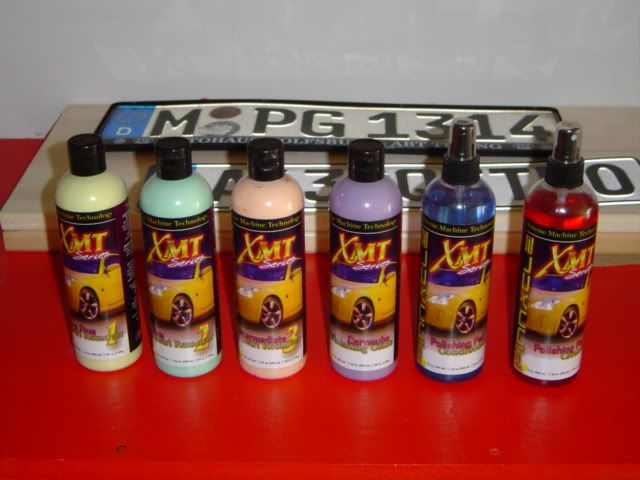
The containers are nice and simple. They have a Nissan 350Z on all of the labels. Because they aren't overdone, but do have a bit of style to them, I really like the overall design. There are very clear and understandable directions on each product as well as what they are to be used for. I'm not a huge fan of the top cap for the swirl removers. It is a flip cap design and can get in the way of product dispersal. I would much rather see a tab style top, like the ones used by PB's and Meguiars.
I washed the vehicle yesterday to get the majority of the bugs and other debris off of my vehicle that were on there from the trip I made a few days ago. I washed with NXT. Today I just hit up the vehicle with a bit of PB's S&W to take care of anything that had gathered on the paint after the wash yesterday. This is what I was starting out with. Nothing too serious, just a few swirls here and there. There were quite a few bug splatter spots though.


I hit up the front end of the car with Wolfgang's Elastic Poly Clay to take care of the splatter marks and then it was on to the polishing. I started out with the Fine Swirl Remover (Step 2 of 3) It has a moderate smell and I can't distinguish what it is. It is not unpleasant though. Directions are as followed:
-A dual action polisher is recommended. Pour a quater-size ammount of XMT Fine Swirl Remover onto a polishing pad. With the polisher turned off, spread the polish over a 2x2 ft. section to avoid splatter. Set the polisher to a maximum speed of 5 or 5.5. Work the polish into the paint in an overlapping, figure eight motion. When the polish begins to dry, turn the polisher off and lift it off the paint. Buff away the haze with a clean, soft microfiber towel or bonnet. Follow with your favorite Pinnacle wax.
Following the instructions I worked the product into my paint. It spread very well, but I did notice a decent amount of dusting. Nothing major and it wiped of fairly easily. After polishing the product wiped off easily. Paint felt very smooth after polishing. The correction power of this product is slightly less than that of PB's SSR 2.5, but still gets rid of most minor scratches and swirl marks.
Next was the Carnauba Finishing Glaze. It's really liquidy and smells like grapes. Directions are the same as the Fine Swirl Remover. Again, following the instructions I worked into my paint. It spread very easily. I found out quickly that a little goes a long, long way. The product wiped off easily and left a smooth glass like finish. It's a really nice glaze and produced great results.
During the polishing, I made sure to use the Polishing Pad Conditioner. It has a very strong chemical smell that will give you a nice wake up. The directions are as followed:
Before you begin polishing, mist the pad once with XMT Polishing Pad Conditioner. Apply the desired product to the pad and polish as usual. Mist pad as needed while polishing to prevent products from caking within the foam. Cleaning the pad will be easier because the product will not dry out inside the foam's prores.
This is a great product as it really doesn't let the product get too soaked into the pad. A small spritz every now and then really helps to lubricate the pad. Later on, it helped with cleaning since the product didn't soak into the pad much. I strongly advise anyone with a PC or rotary to get this product.
After I was done with the detail, I cleaned my two pads off with the Polishing Pad Cleaner. This also has a chemical storm, but it's not that strong. Directions are as follows:
-Spray used pads generously with XMT Polishing Pad Cleaner. Agitate with a brush if necessary. Rinse the pads to air dry completely before using them again. Let the cleaner soak into severely caked pads for several seconds before rinsing.
-Dry foam and wool pads by spinning each pad on your polisher for several seconds. Water will sling so step away from the vehicle. Then lay out the pads on a flat surface to completely dry.
-Store your clean, dry pads in plastic bags to keep them clean between details.
I found this to be a great product because it eliminates soaking or putting your pads in the washing machine to wash them. Following the directions left the pads clean and ready for the next use. I would also highly recommend this product to anyone who uses a PC or rotary.
If you have read all of this, I would appreciate some feedback. Any comments or questions are welcomed.
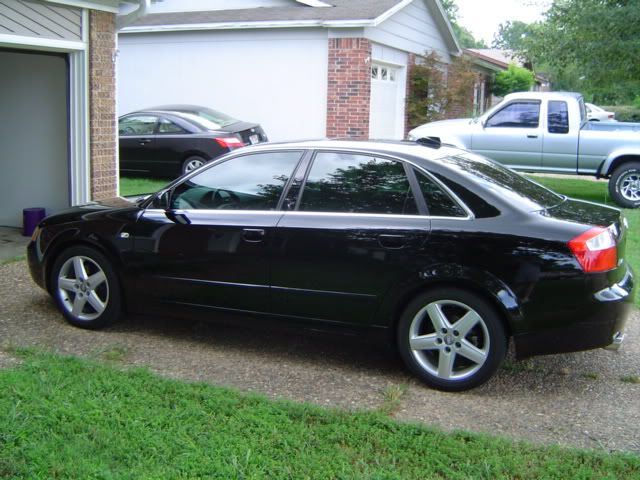
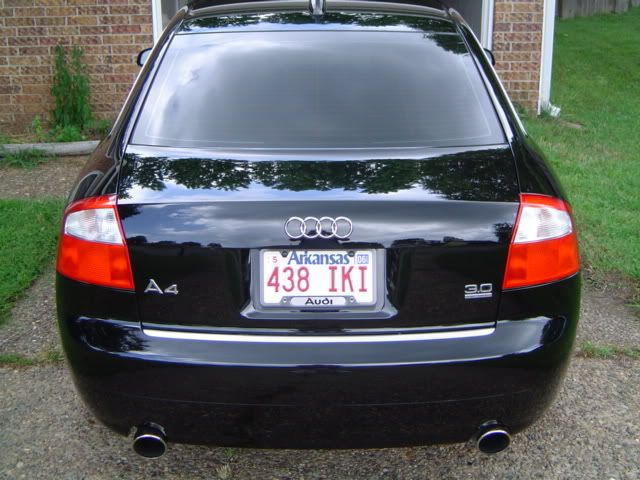
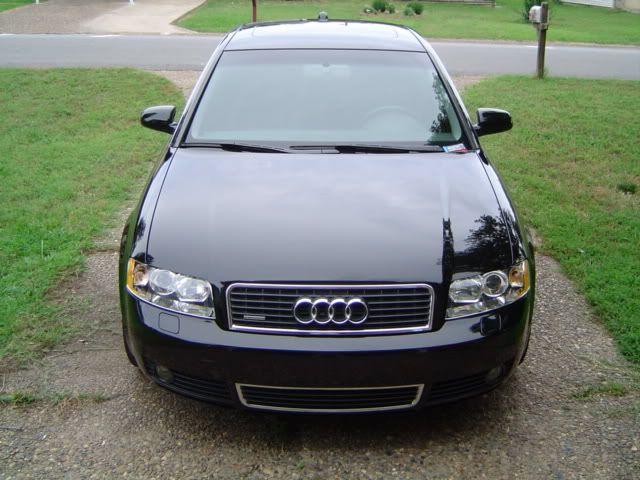
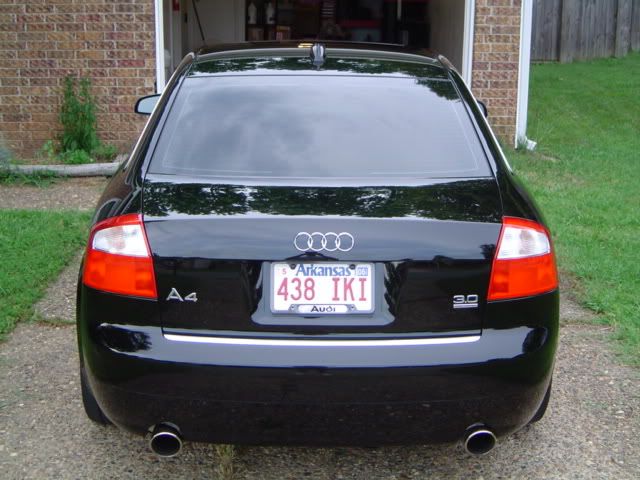
Well, here are the finished results. It was a little dark by the time I finished, so the pictures aren't the greatest.


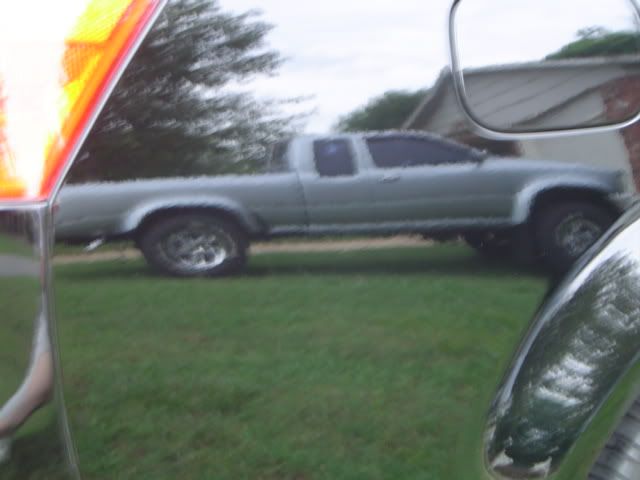
This isn't the best reflection shot I've taken with this car, but it's the only way I could fit my neighbors truck in without showing off my ugly mug.
I decided that my A4 needed some attention today after the last few weeks of a ton of driving and harsh conditions I put her through. In the last three weeks I put over 3,000 miles on her and tracked her on a road course up in Michigan. I thought it would also be a great opportunity to write up a review on the Pinnacle XMT Series products that I won from the Autogeek contest. My car is generally well cared for, as are most of the owners vehicles on here, so I won't be reviewing the Ultra Fine Swirl Remover (Step 1) because I am going from the Fine Swirl Remover (Step 2) straight to the Carnauba Finishing Glaze. I will also not be reviewing the Intermediate Swirl Remover (Step 3) because my paint does not require that much correction.
The containers are nice and simple. They have a Nissan 350Z on all of the labels. Because they aren't overdone, but do have a bit of style to them, I really like the overall design. There are very clear and understandable directions on each product as well as what they are to be used for. I'm not a huge fan of the top cap for the swirl removers. It is a flip cap design and can get in the way of product dispersal. I would much rather see a tab style top, like the ones used by PB's and Meguiars.
I washed the vehicle yesterday to get the majority of the bugs and other debris off of my vehicle that were on there from the trip I made a few days ago. I washed with NXT. Today I just hit up the vehicle with a bit of PB's S&W to take care of anything that had gathered on the paint after the wash yesterday. This is what I was starting out with. Nothing too serious, just a few swirls here and there. There were quite a few bug splatter spots though.
I hit up the front end of the car with Wolfgang's Elastic Poly Clay to take care of the splatter marks and then it was on to the polishing. I started out with the Fine Swirl Remover (Step 2 of 3) It has a moderate smell and I can't distinguish what it is. It is not unpleasant though. Directions are as followed:
-A dual action polisher is recommended. Pour a quater-size ammount of XMT Fine Swirl Remover onto a polishing pad. With the polisher turned off, spread the polish over a 2x2 ft. section to avoid splatter. Set the polisher to a maximum speed of 5 or 5.5. Work the polish into the paint in an overlapping, figure eight motion. When the polish begins to dry, turn the polisher off and lift it off the paint. Buff away the haze with a clean, soft microfiber towel or bonnet. Follow with your favorite Pinnacle wax.
Following the instructions I worked the product into my paint. It spread very well, but I did notice a decent amount of dusting. Nothing major and it wiped of fairly easily. After polishing the product wiped off easily. Paint felt very smooth after polishing. The correction power of this product is slightly less than that of PB's SSR 2.5, but still gets rid of most minor scratches and swirl marks.
Next was the Carnauba Finishing Glaze. It's really liquidy and smells like grapes. Directions are the same as the Fine Swirl Remover. Again, following the instructions I worked into my paint. It spread very easily. I found out quickly that a little goes a long, long way. The product wiped off easily and left a smooth glass like finish. It's a really nice glaze and produced great results.
During the polishing, I made sure to use the Polishing Pad Conditioner. It has a very strong chemical smell that will give you a nice wake up. The directions are as followed:
Before you begin polishing, mist the pad once with XMT Polishing Pad Conditioner. Apply the desired product to the pad and polish as usual. Mist pad as needed while polishing to prevent products from caking within the foam. Cleaning the pad will be easier because the product will not dry out inside the foam's prores.
This is a great product as it really doesn't let the product get too soaked into the pad. A small spritz every now and then really helps to lubricate the pad. Later on, it helped with cleaning since the product didn't soak into the pad much. I strongly advise anyone with a PC or rotary to get this product.
After I was done with the detail, I cleaned my two pads off with the Polishing Pad Cleaner. This also has a chemical storm, but it's not that strong. Directions are as follows:
-Spray used pads generously with XMT Polishing Pad Cleaner. Agitate with a brush if necessary. Rinse the pads to air dry completely before using them again. Let the cleaner soak into severely caked pads for several seconds before rinsing.
-Dry foam and wool pads by spinning each pad on your polisher for several seconds. Water will sling so step away from the vehicle. Then lay out the pads on a flat surface to completely dry.
-Store your clean, dry pads in plastic bags to keep them clean between details.
I found this to be a great product because it eliminates soaking or putting your pads in the washing machine to wash them. Following the directions left the pads clean and ready for the next use. I would also highly recommend this product to anyone who uses a PC or rotary.
If you have read all of this, I would appreciate some feedback. Any comments or questions are welcomed.
Well, here are the finished results. It was a little dark by the time I finished, so the pictures aren't the greatest.
This isn't the best reflection shot I've taken with this car, but it's the only way I could fit my neighbors truck in without showing off my ugly mug.
