imported_Dave KG
New member
Its called Ultra Finishing Polish and uses Meguiars' new Super Micro Abrasive Technology (SMAT) [am I the only one who thinks SPLAT when I read/type that?!:lol:]... Its been designed to rock the best and be the best finishing polish on the market, no doubting, Meguiars have gone for the jugular of Menzerna here! But for all its advanced technology, it is really any good? Is it the best, or is it just an also-ran....?
Well - here are my thoughts")
I first started trialling Meguiars #205 back in the early months of the year. It would be fair to say then that I saw a potential for this product as not only was it matching the finishes from 85RD with little learning, it was also dealing more happily with sticky paint... I went to buy some, and noticed the price: over £30 for a litre makes it quite expensive, but I went for a bottle to see what like if you really learn its ins and outs - boy, I'm glad I did!
The Theory
The vast majority of polishes that see regular use in detailing use what are known as Diminishing Abrasives - these are abrasives that break down over the period of the polishing set, gradually reducing their cut and inceasing the level of gloss they can produce. This places finite work times on them, in that you need to work them for the desired length of time to get them to break down but also once broken down, you cannot work them further for a greater result... But the good side is that they are quite "plug and play": work the polish until the residue goes clear and you pretty much gaurantee a great finish but working the abrasives
The abrasives used in Meguiars #205 (and also #105) are quite different... Unigrit, they remain abrasive at the same level throughout the polishing set and do not break down. In some ways this sounds a bit "wrong" - sure if the abrasive is not breaking down, then it will leave marring in the finish as it always cutting. But this is not the case with unigrit abrasives, simply the application styles and techniques must change to get the best from them. Unigrit is not new - Meguiars have been using them before in the Solo range, MarkV in Mystique for example. You can also vary the cut levels by varying the pad aggression and the pressure applied.
With this in mind, Meguiars #205 is a product that is designed to offer the user a lot of flexibility: pressure and pad variations allowing different finishing and cutting abilities, which we will talk a little bit more about below
In Practice
The old school Meguiars polishes, the #80-series, had long work times and diminshing abrasives... they took a bit of getting used to but were highly capable once cracked. Times moved on, however and Menzerna were beginning to forge a lead in the polish technology front with new players such as Gloss It formulating ranges that were beginning to make the humble #80-series feel dated.
Meguiars' response for finishing polises is #205, and unlike a lot of its competition, they have chosen to go down the unigrit abrasive route described above. A risky move you might think, especially given the #86 Solo polishes lack of finishing abilities compared to its competition, both in-house against #83 and on the market against Intensive Polish, Final Finish etc. But in practice is where you start to realise just how good the move is!
Flexibility is the key... If you just start with #205, and use it as you've used other finishing polishes, you will likely find it a bit mediocre... good, pleasing to use, but nothing special. But #205 is not plug and play. It needs to be learned and you need to invest time and learn to change your techniques a little to really get the best out of what it has to offer. This not only applies to varying the pad to vary the cut, but also varying pressures and speeds midset to achieve the results you are looking for.
I have personally found that for finishing the best techniques are to spread the polish at slow speed, and then at moderate speeds of around 1500 - 1800rpm, work with medium pressure over the rotary head. This medium pressure allows for correction, removal of hazing and working of the abrasives... For finishing, I reduce the speed to 900 - 1200rpm and reduce the pressure to very light, this reduces the cut from the abrasives and transforms to polish from lightly correcting to burnishing. Working times vary from paint to paint, and it is best to experiment a little and learn what will achieve the best possible finish.
The beauty of this polish at this stage was becoming obvious for me - forget it being a pour on the pad and off you go polish. No way. There is much more to #205 than this! If you are willing to put in some time learning and manipulating your technique you can really reap rewards from #205 in terms of working flexibility from a single polish, that has left me feeling fundamental limitations to products using diminshing abrasives. Yes you can vary your technique with these too, but there's a finite working time, and finite level of cut that just reduces your full potential with the products - its a bit like a sports car with the traction control stuck on, you get a great finish automatically, but given a bit more freedom you can do just very slightly better. This is how #205 has left me feeling in practice.
Results
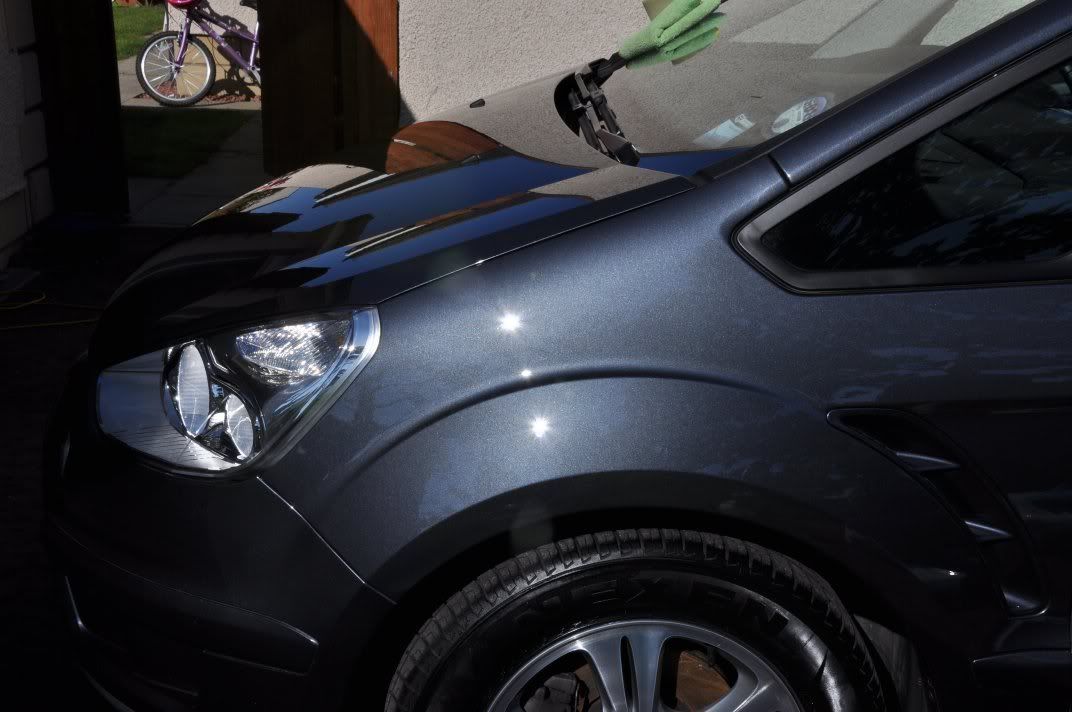
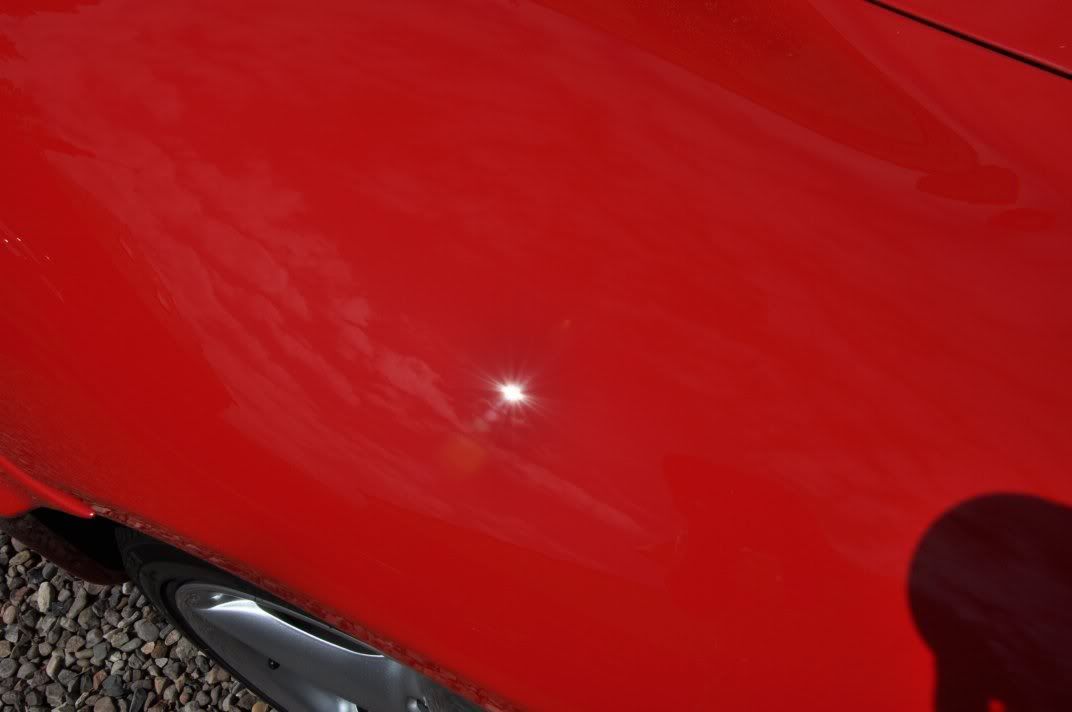
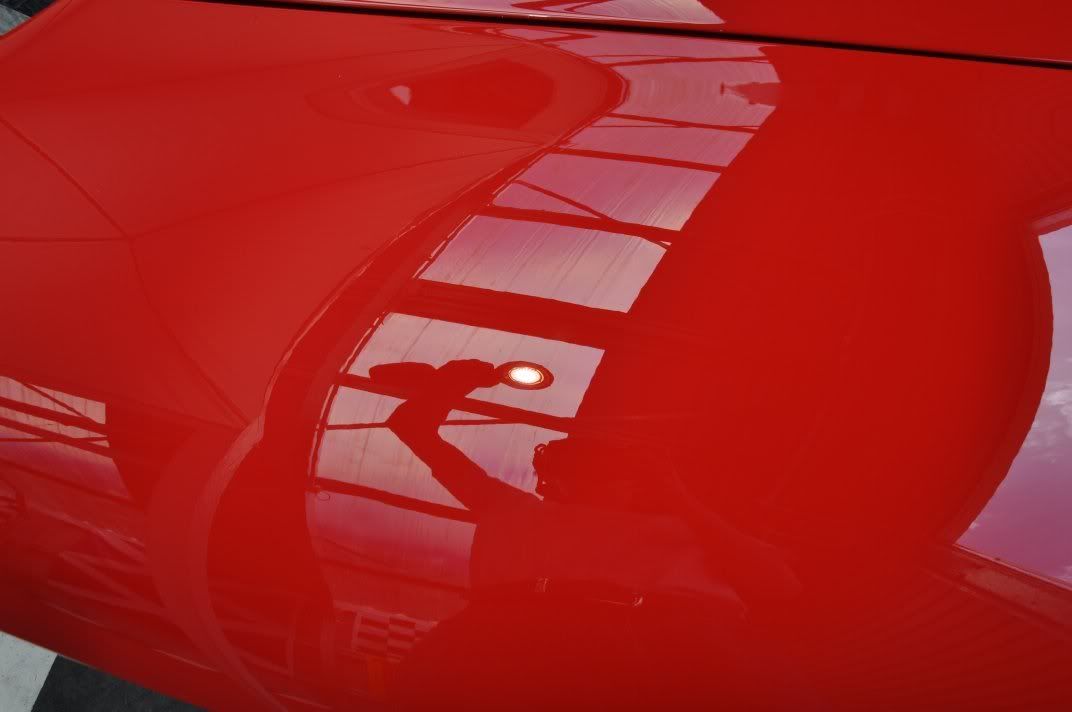
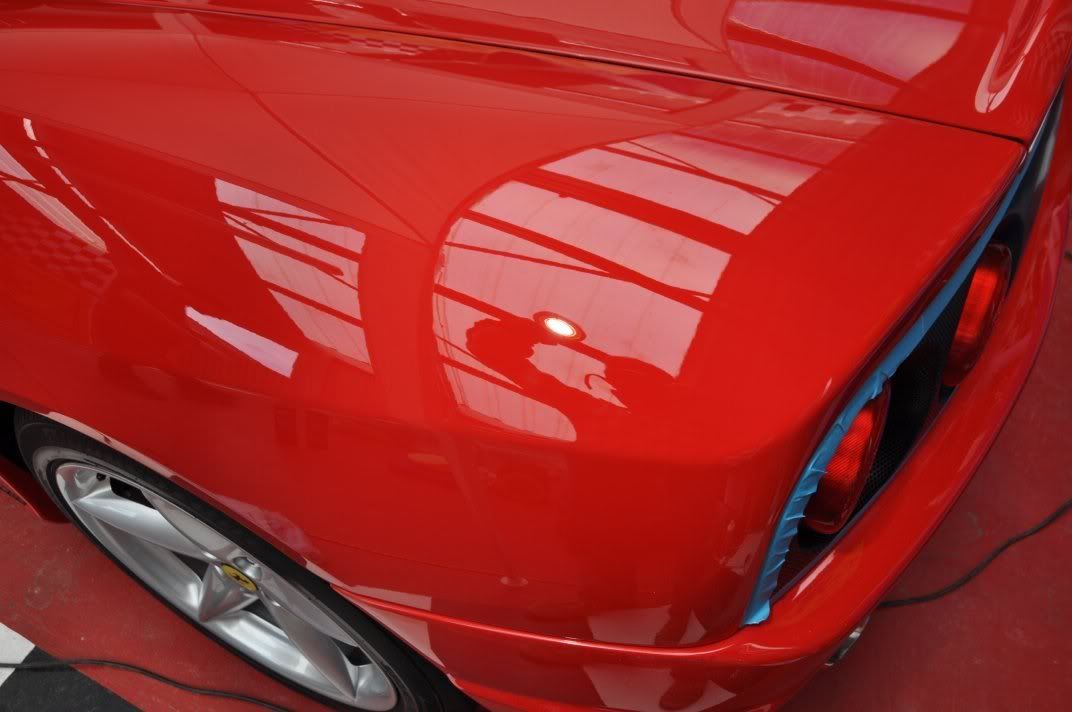
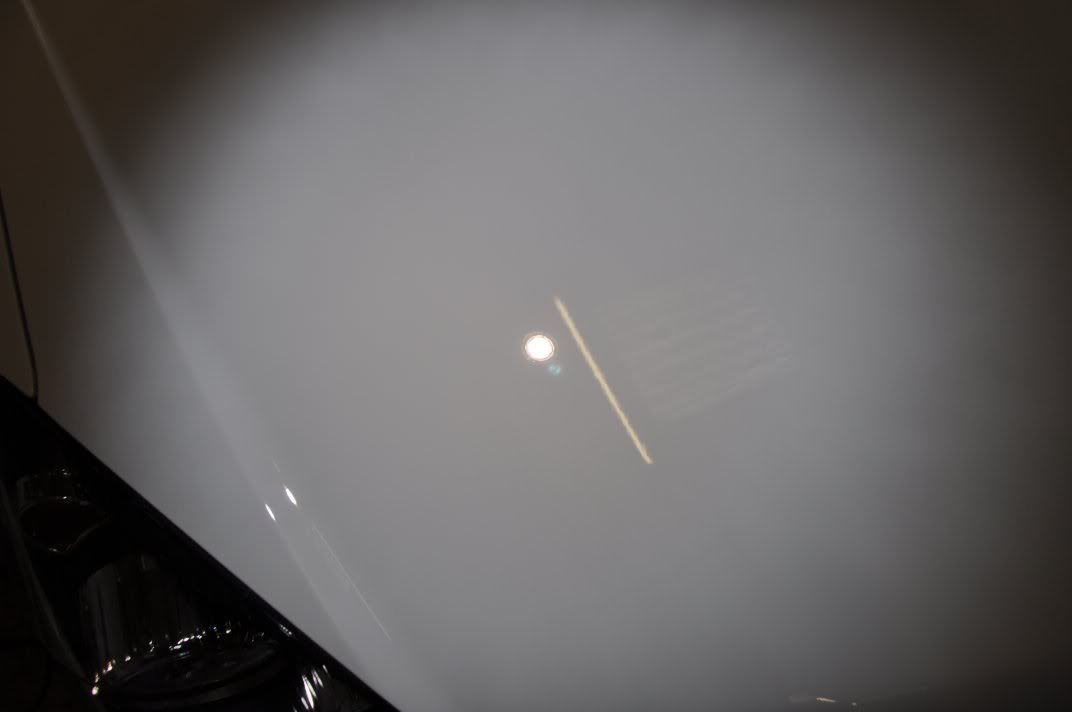
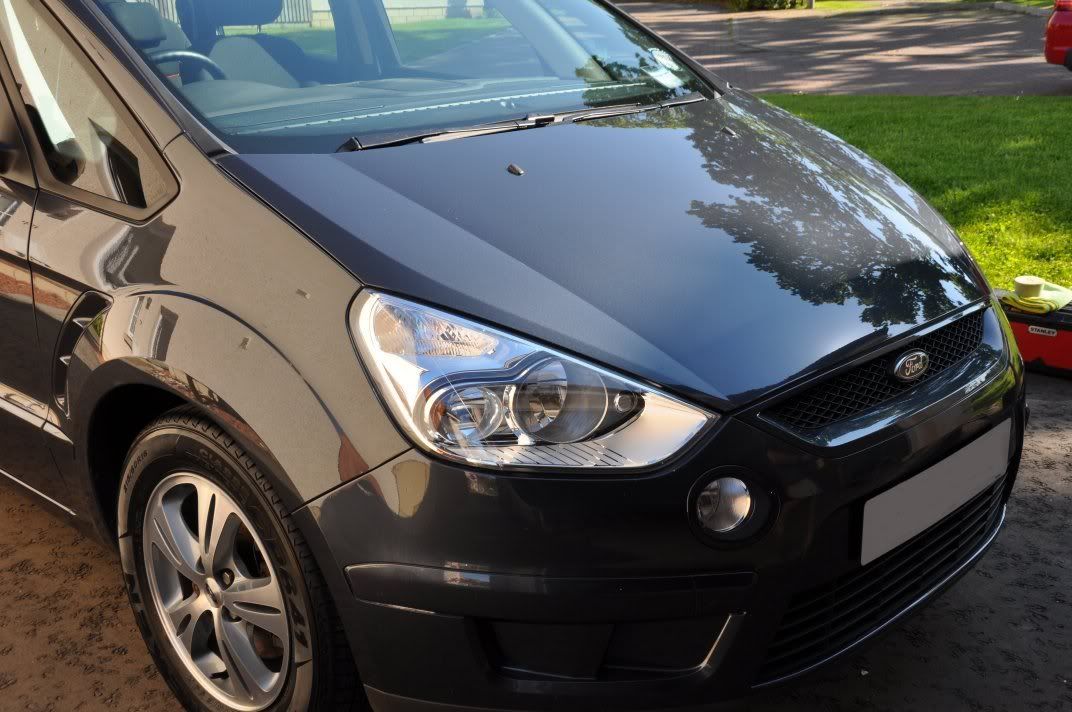
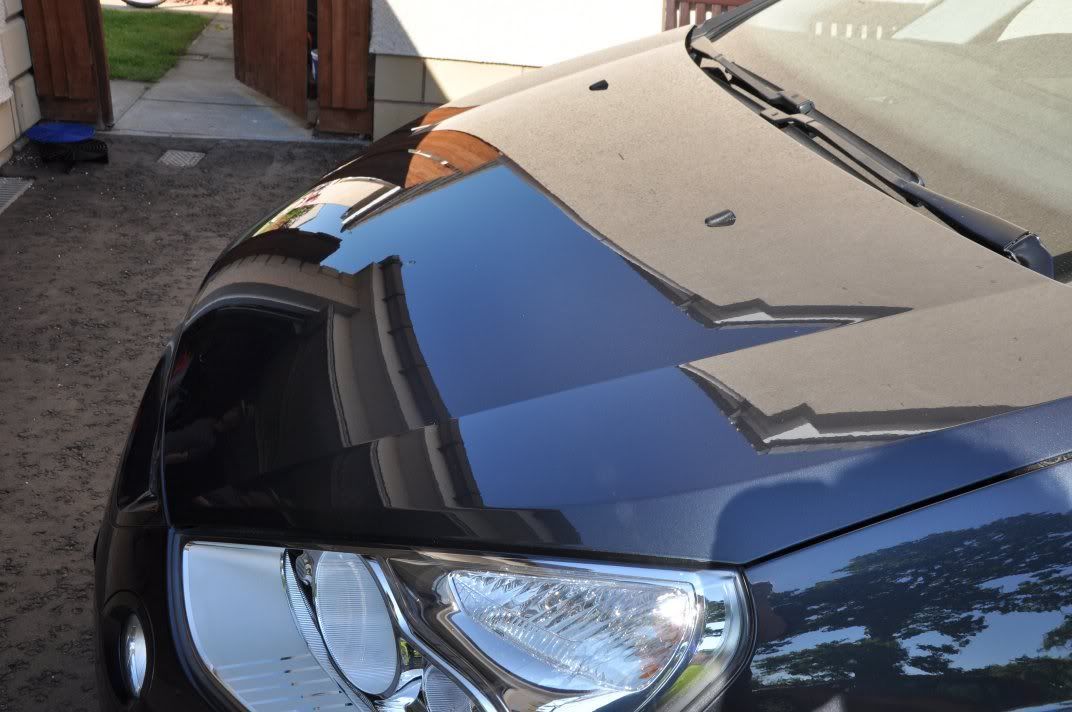
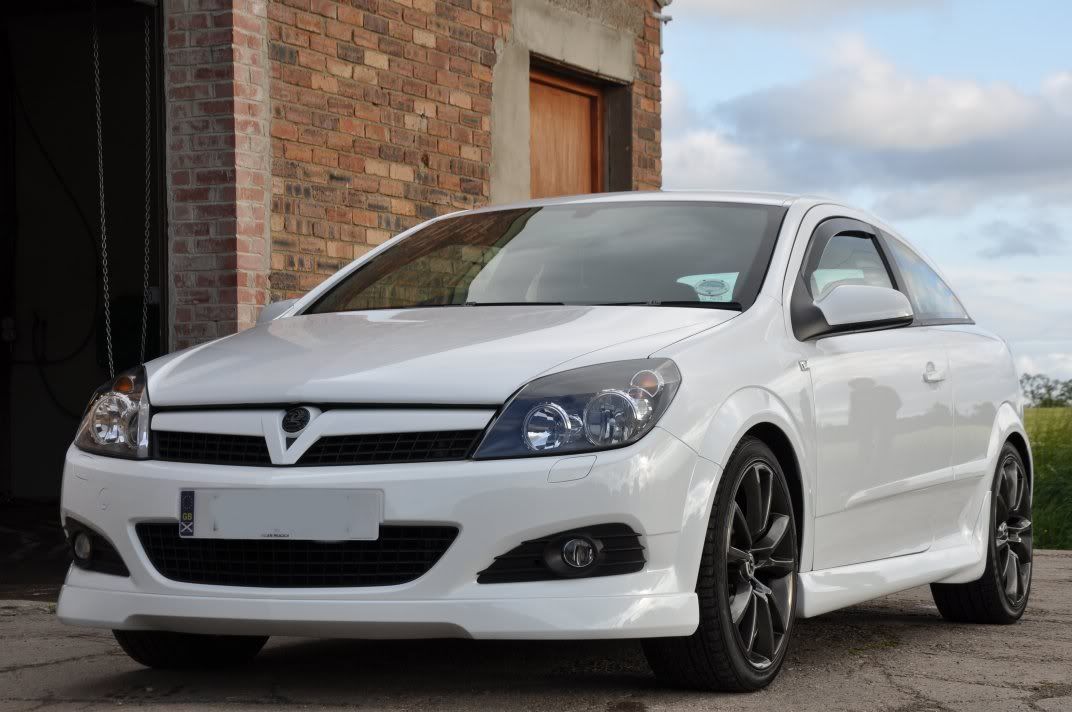
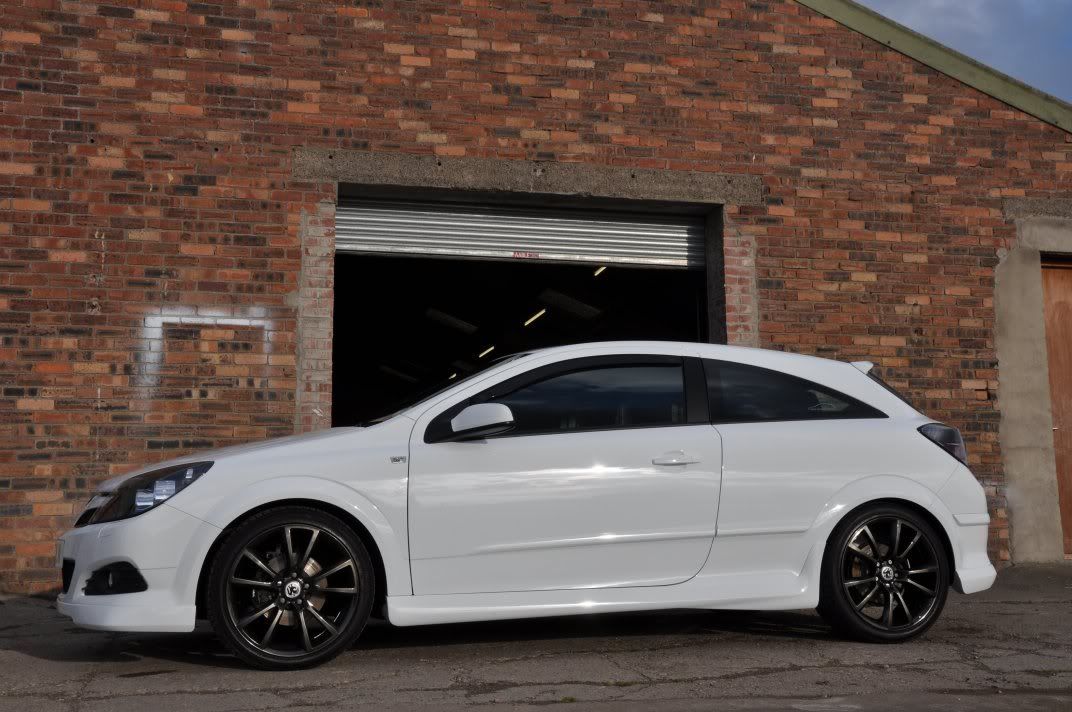
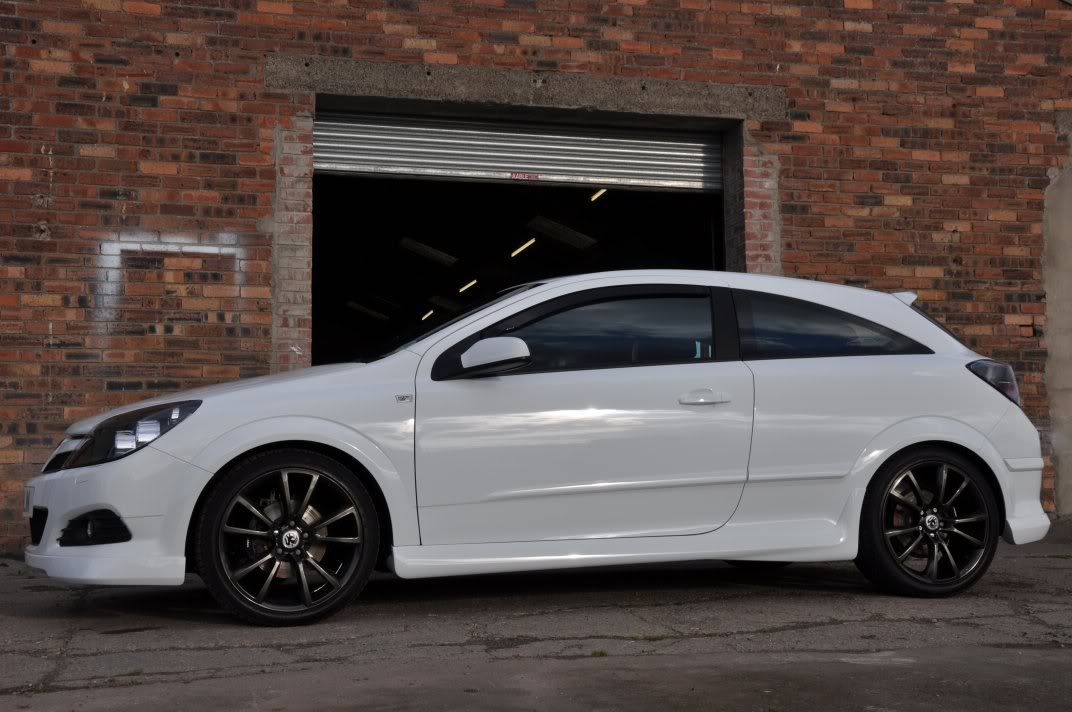
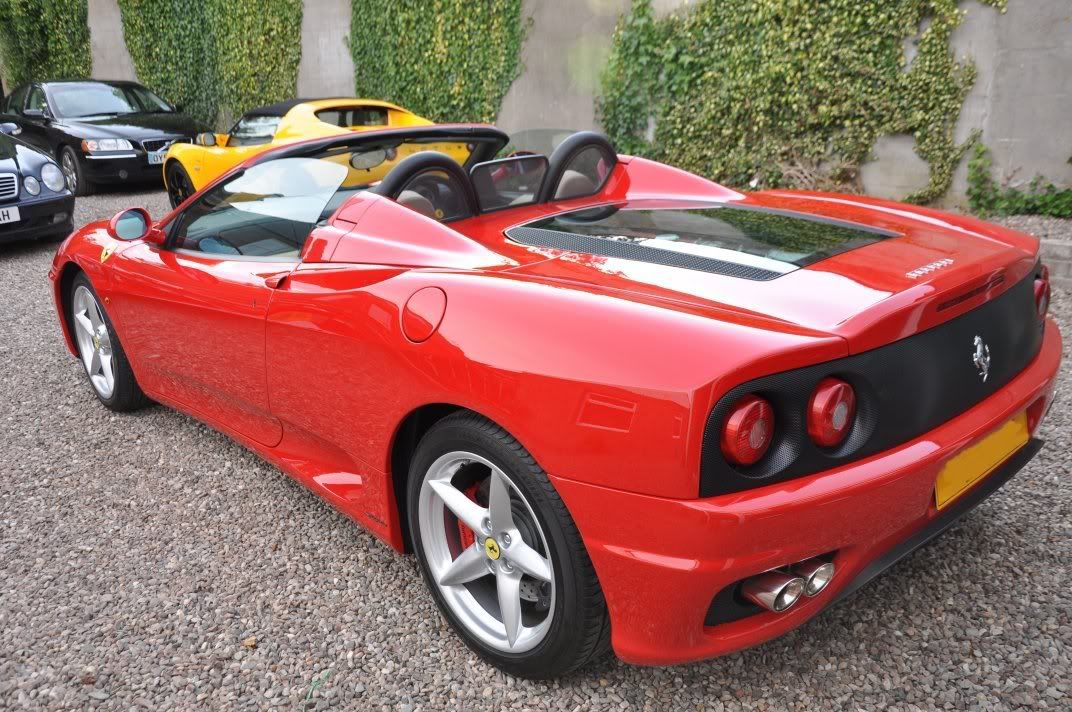
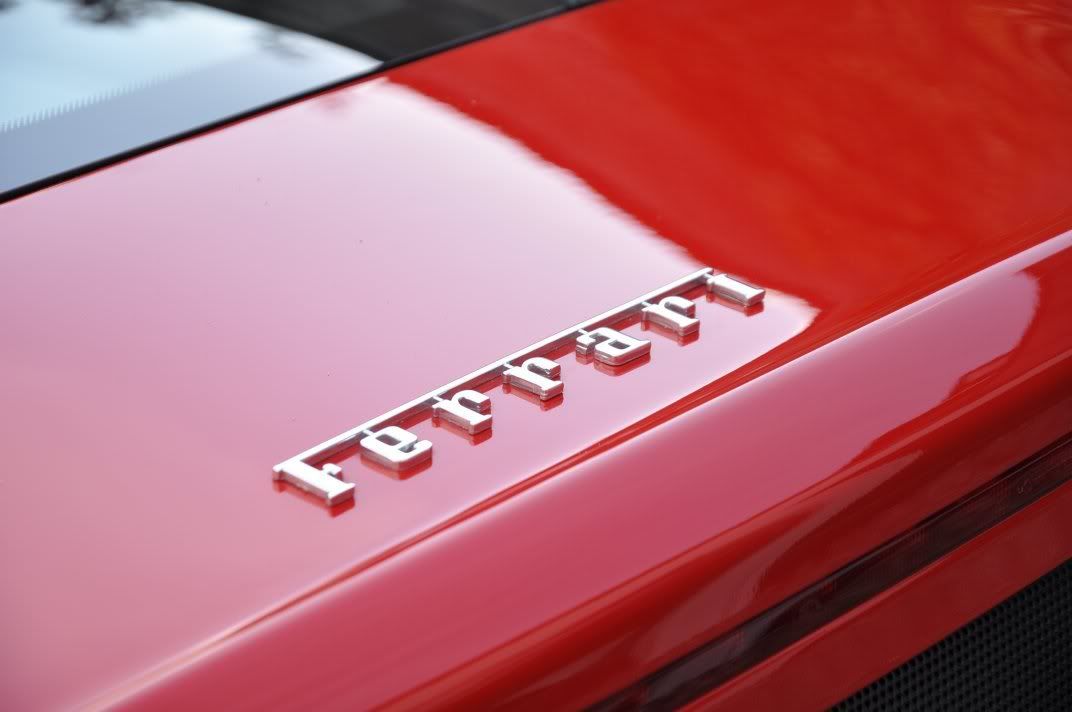
Enough talk... lets let the piccies do the speaking now. First of all, a couple of direct sunlight pictures, showing the clarity achieved from #205 used as a finishing polish on details - both cases applied as discussed above, medium then light pressure to burnish the finish:
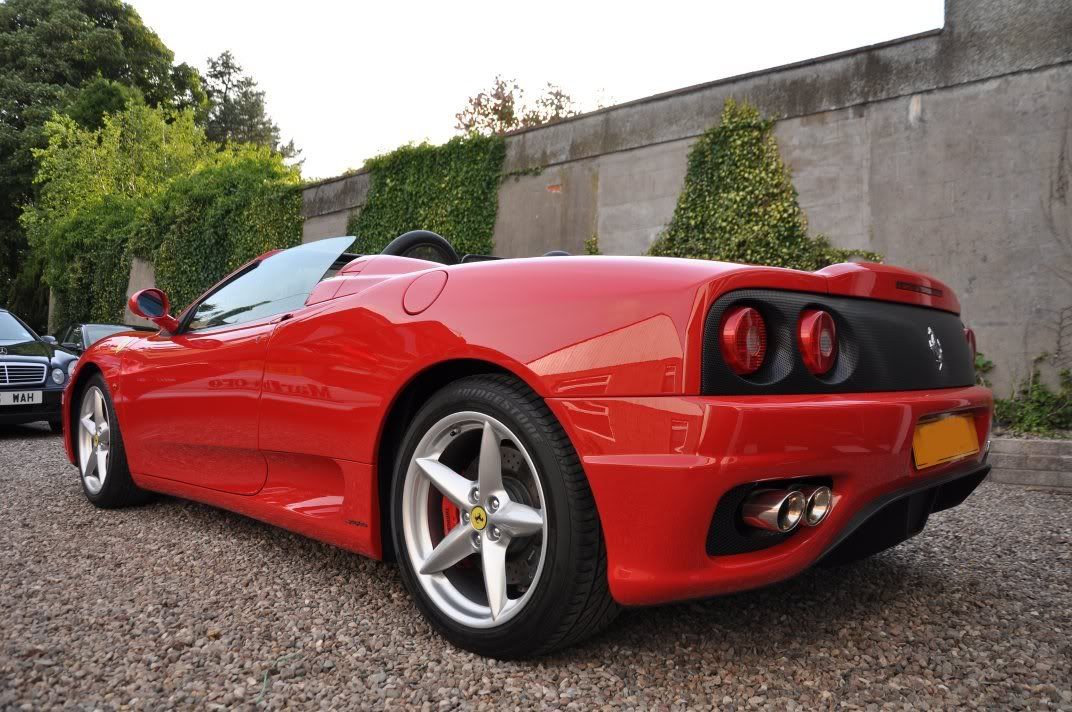
On soft paint (Ford above) and more medium hardness paint (Ferrari below), the clairty achieved by learning the polish and the paint was hugely impressive for me.
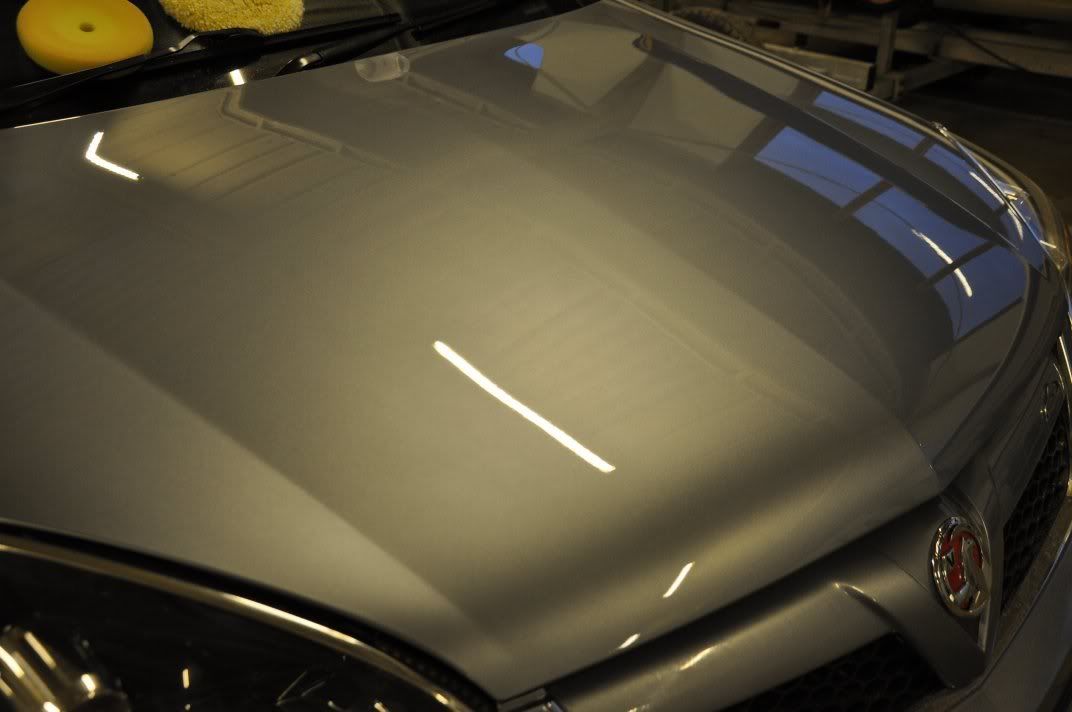
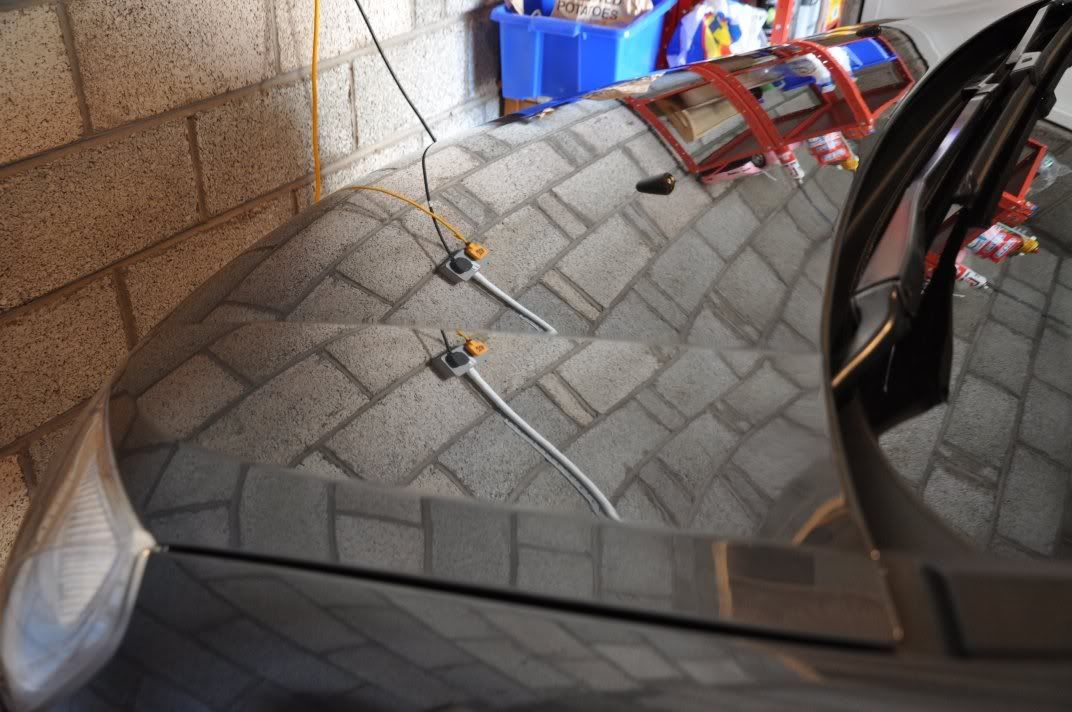
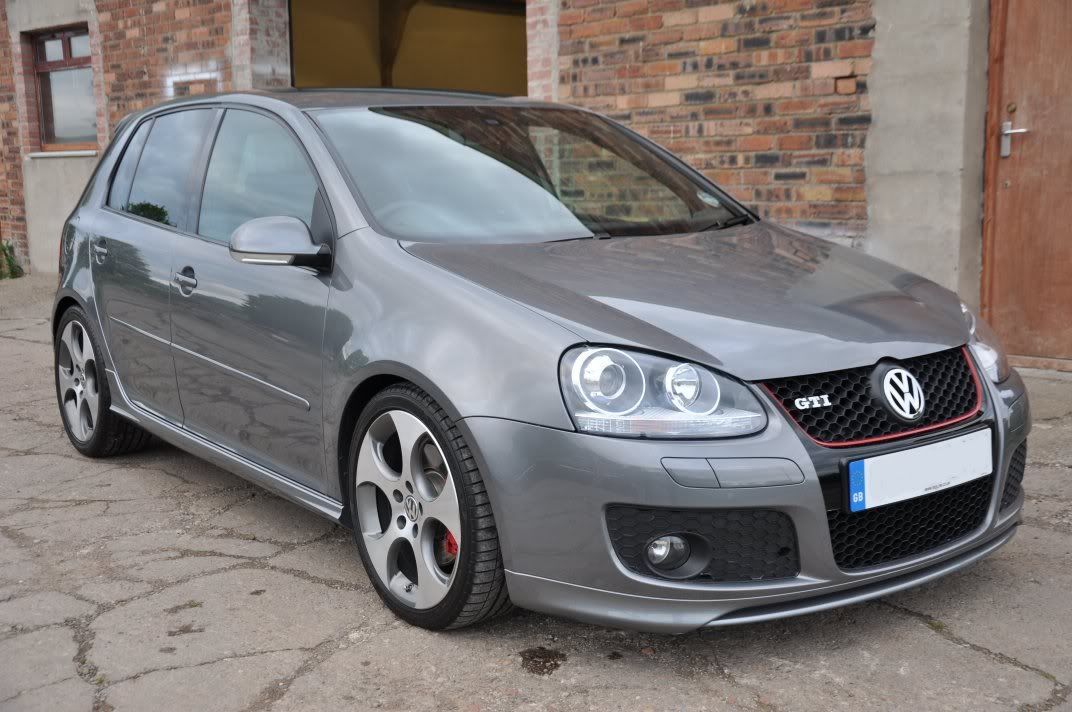
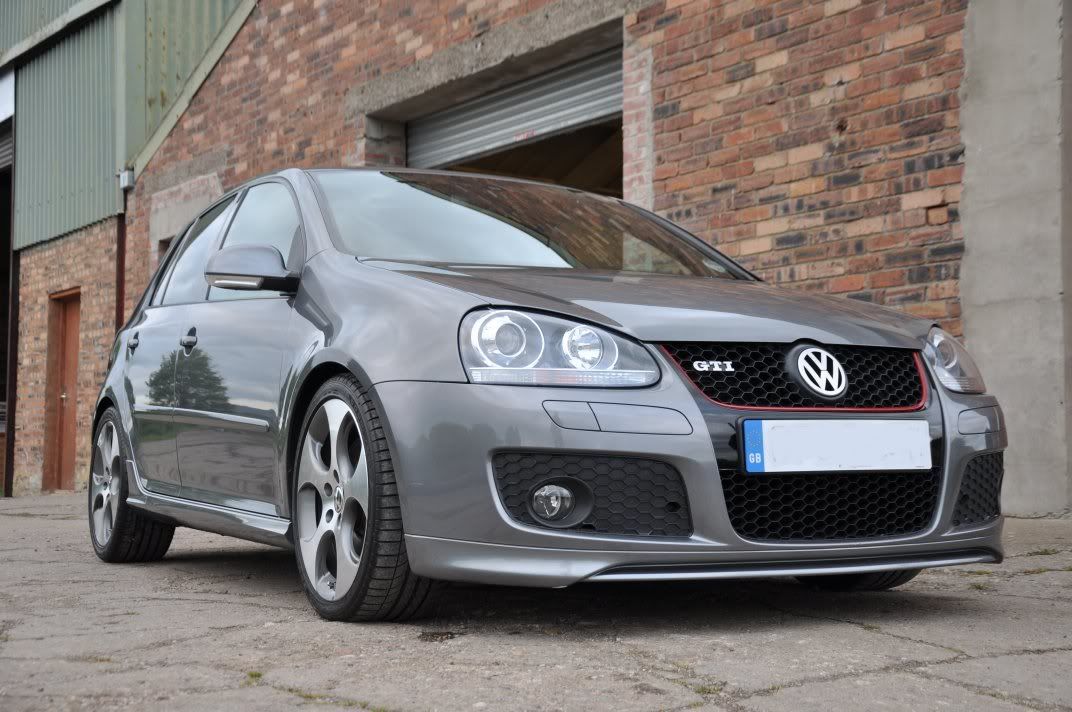
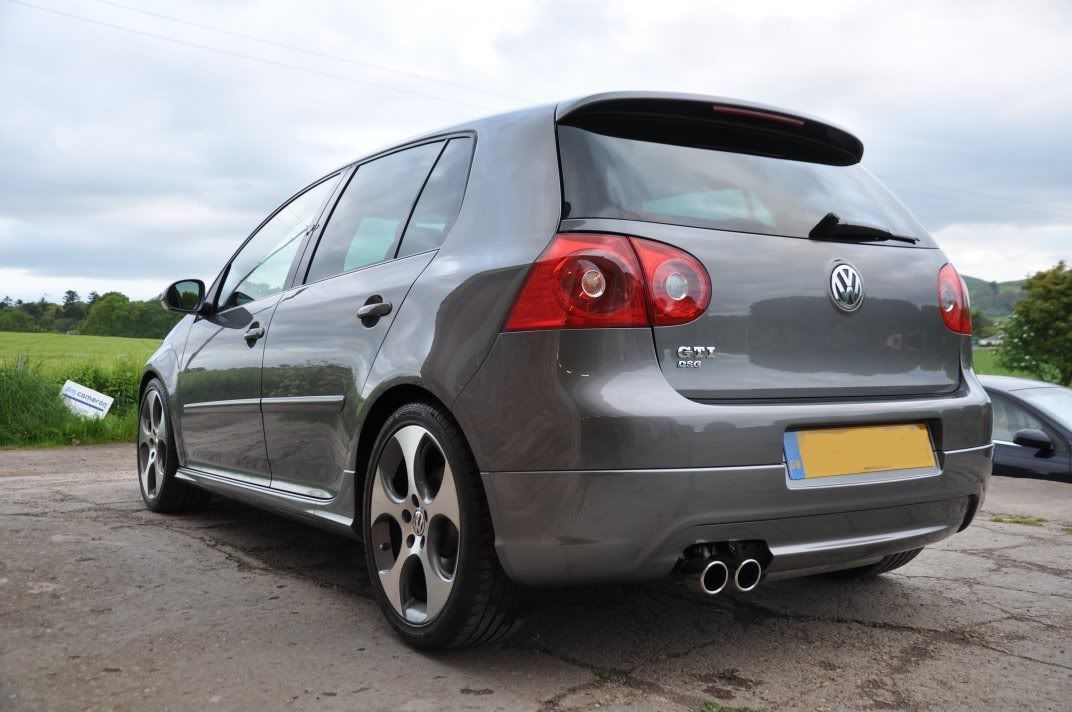
Some examples of the polish finish under the Sun Gun on recent details where I have used #205 as the finishing polish:
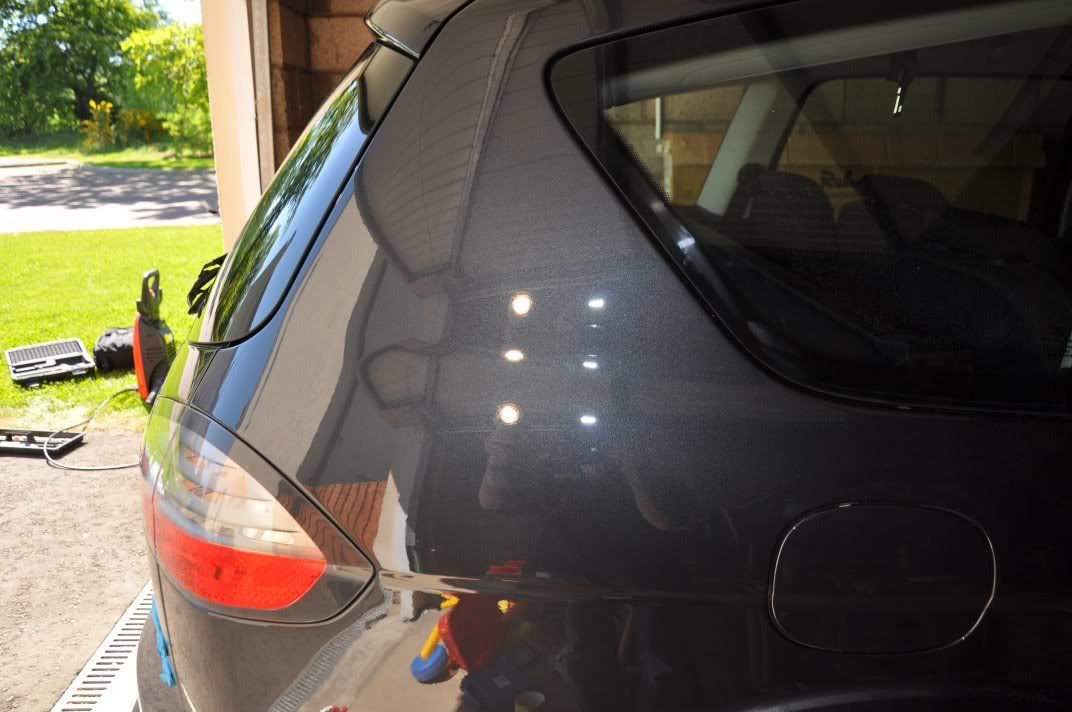
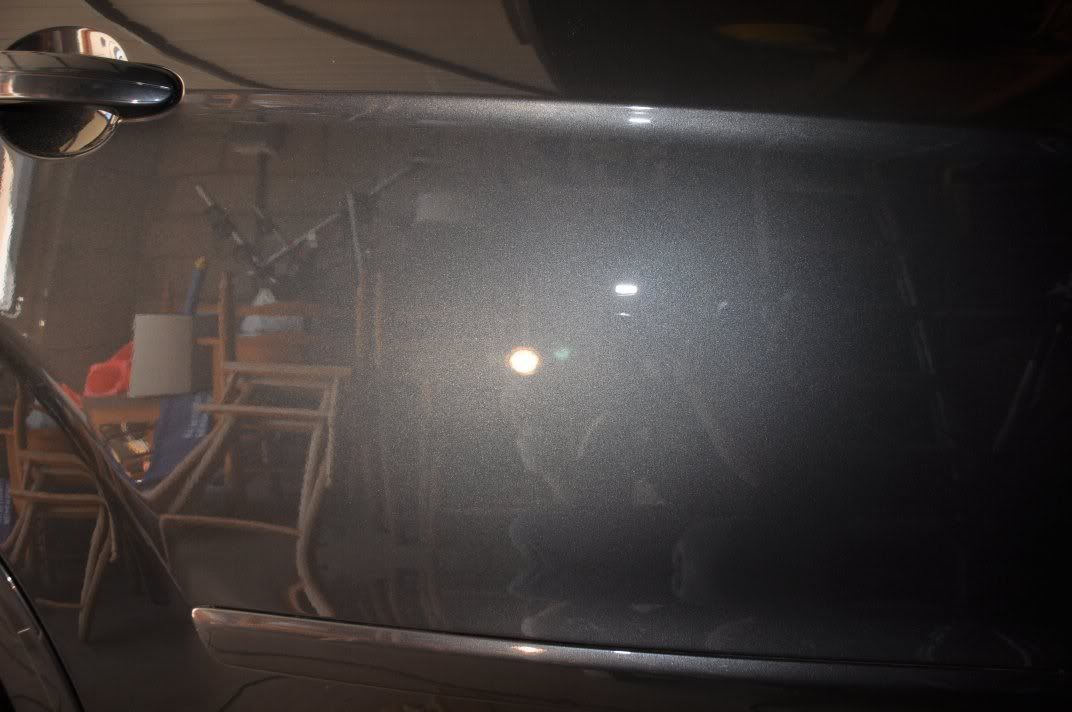
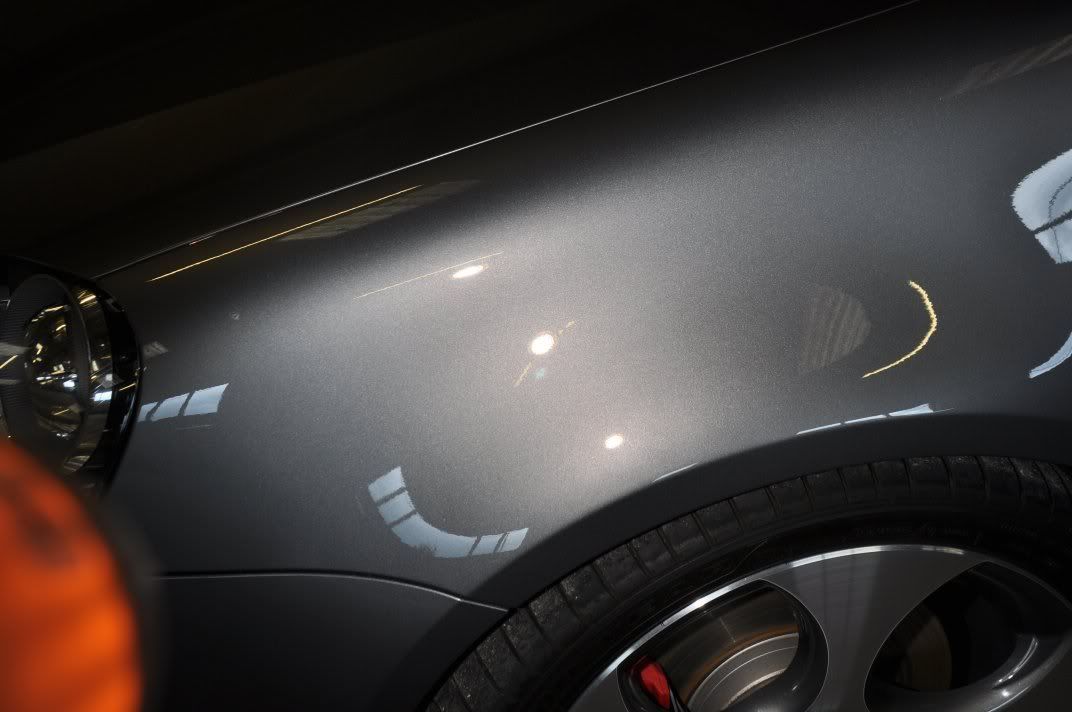
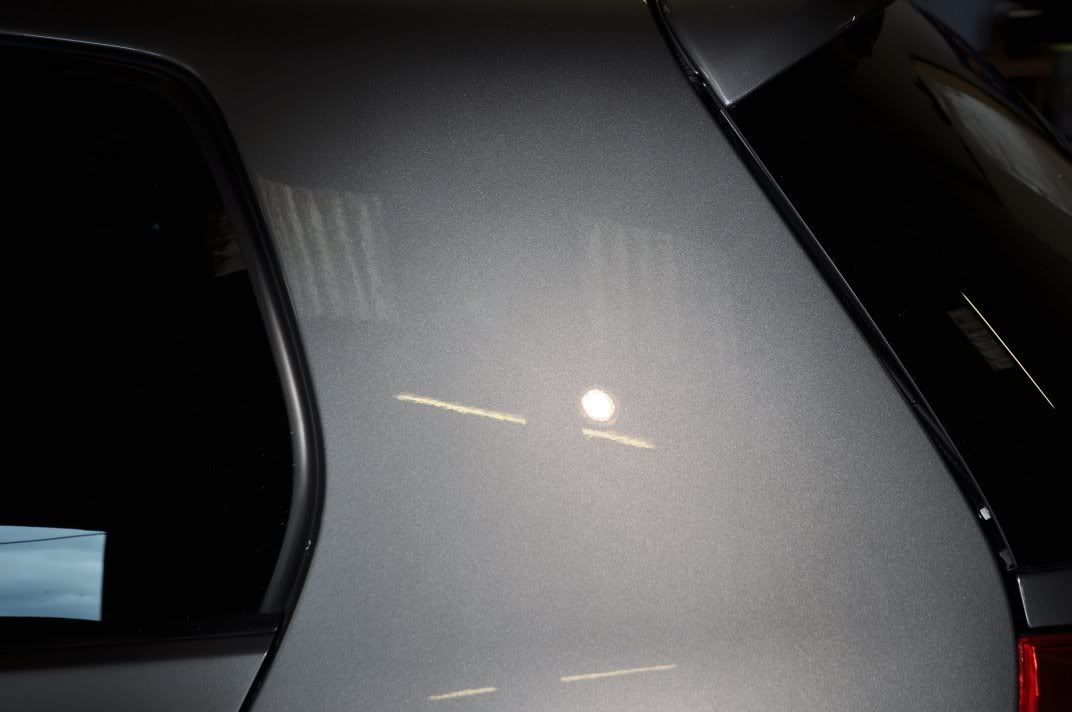
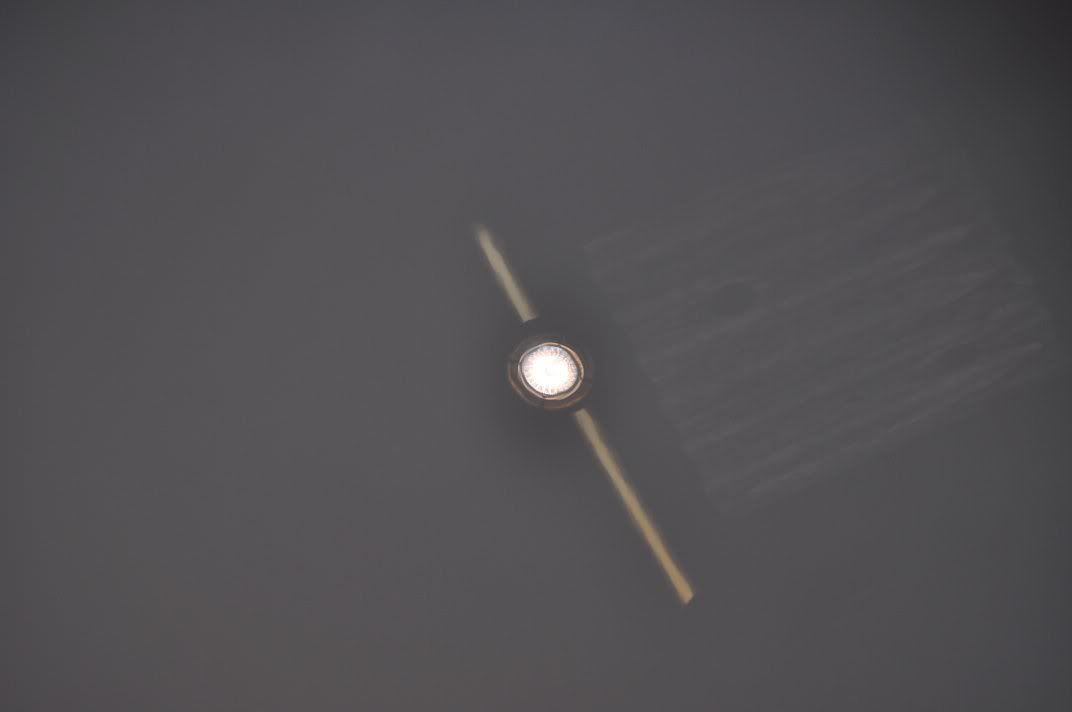
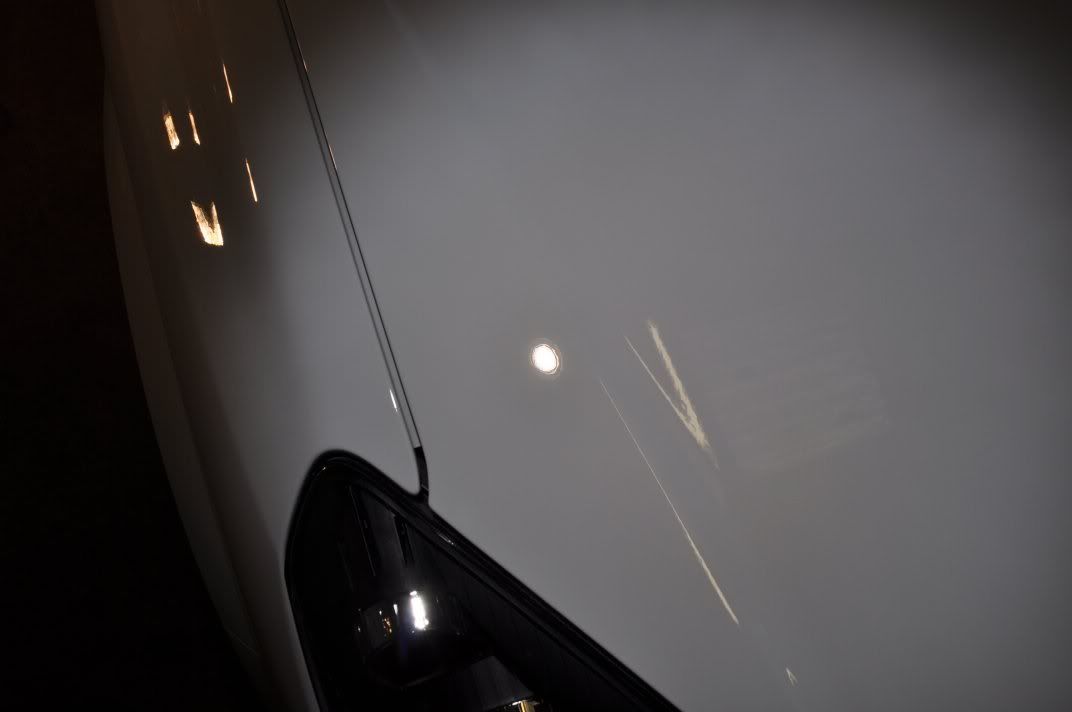

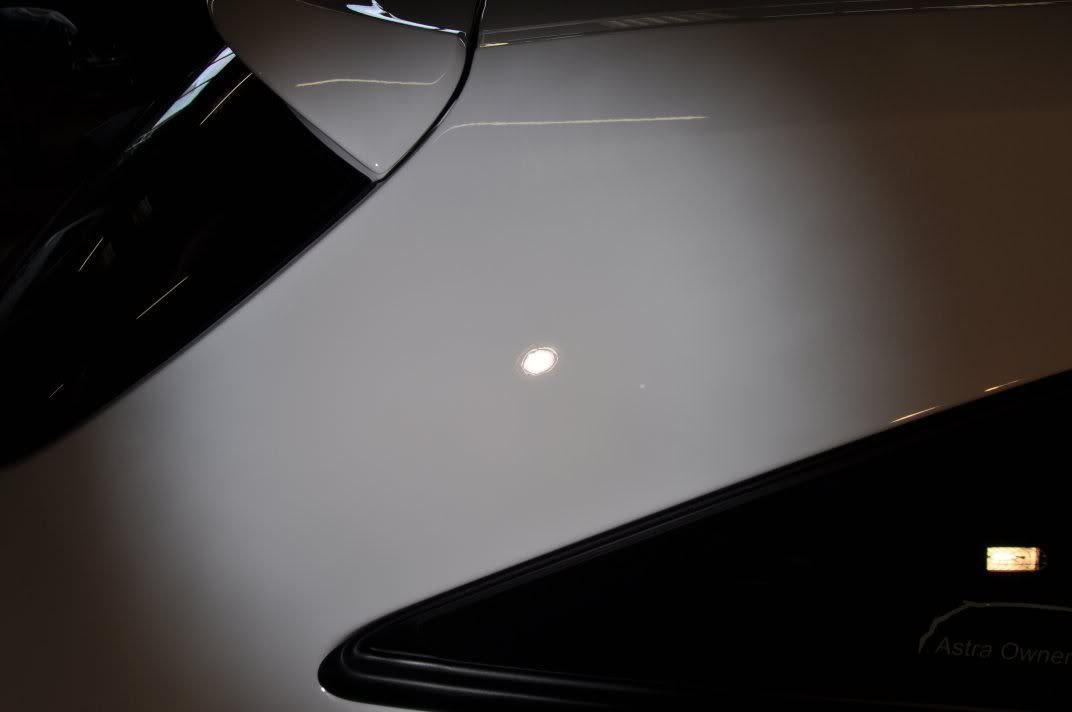
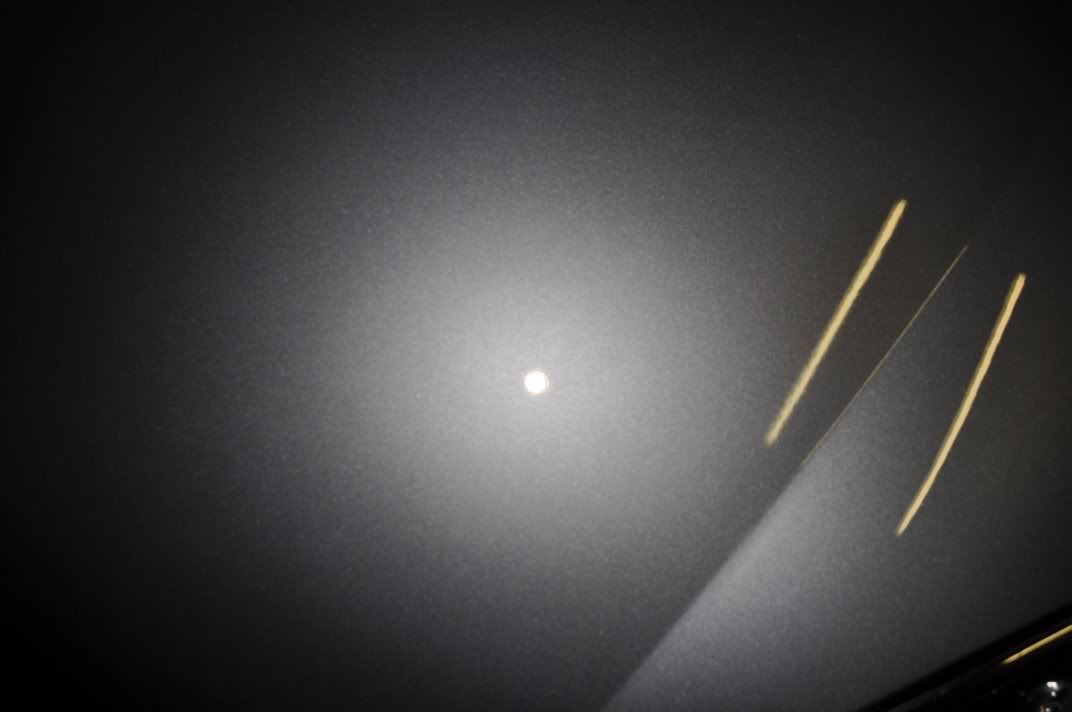
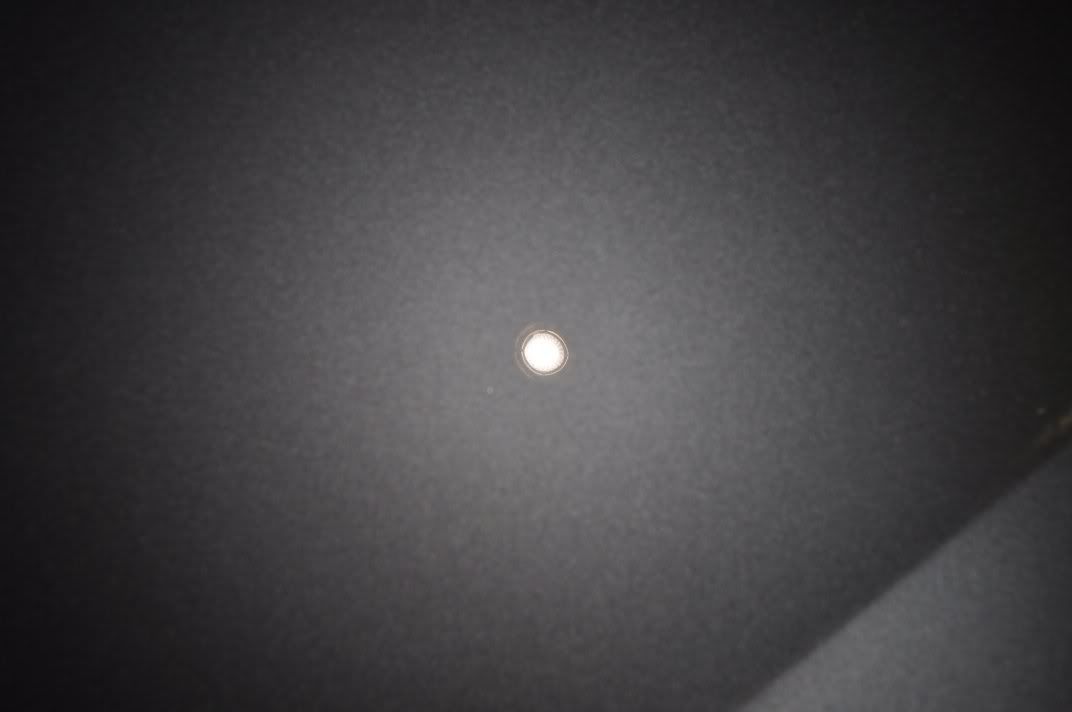
When assessing the clarity of the finish, look at the metallic flake ping (sealants dont achieve this, a properly burnished finish does") ), and the detail of the light sources in that you can not only see no swirls, the reflection is good to the point you can see the detail of the Sun Gun / Camera Flash
), and the detail of the light sources in that you can not only see no swirls, the reflection is good to the point you can see the detail of the Sun Gun / Camera Flash
Well - here are my thoughts
I first started trialling Meguiars #205 back in the early months of the year. It would be fair to say then that I saw a potential for this product as not only was it matching the finishes from 85RD with little learning, it was also dealing more happily with sticky paint... I went to buy some, and noticed the price: over £30 for a litre makes it quite expensive, but I went for a bottle to see what like if you really learn its ins and outs - boy, I'm glad I did!
The Theory
The vast majority of polishes that see regular use in detailing use what are known as Diminishing Abrasives - these are abrasives that break down over the period of the polishing set, gradually reducing their cut and inceasing the level of gloss they can produce. This places finite work times on them, in that you need to work them for the desired length of time to get them to break down but also once broken down, you cannot work them further for a greater result... But the good side is that they are quite "plug and play": work the polish until the residue goes clear and you pretty much gaurantee a great finish but working the abrasives
The abrasives used in Meguiars #205 (and also #105) are quite different... Unigrit, they remain abrasive at the same level throughout the polishing set and do not break down. In some ways this sounds a bit "wrong" - sure if the abrasive is not breaking down, then it will leave marring in the finish as it always cutting. But this is not the case with unigrit abrasives, simply the application styles and techniques must change to get the best from them. Unigrit is not new - Meguiars have been using them before in the Solo range, MarkV in Mystique for example. You can also vary the cut levels by varying the pad aggression and the pressure applied.
With this in mind, Meguiars #205 is a product that is designed to offer the user a lot of flexibility: pressure and pad variations allowing different finishing and cutting abilities, which we will talk a little bit more about below
In Practice
The old school Meguiars polishes, the #80-series, had long work times and diminshing abrasives... they took a bit of getting used to but were highly capable once cracked. Times moved on, however and Menzerna were beginning to forge a lead in the polish technology front with new players such as Gloss It formulating ranges that were beginning to make the humble #80-series feel dated.
Meguiars' response for finishing polises is #205, and unlike a lot of its competition, they have chosen to go down the unigrit abrasive route described above. A risky move you might think, especially given the #86 Solo polishes lack of finishing abilities compared to its competition, both in-house against #83 and on the market against Intensive Polish, Final Finish etc. But in practice is where you start to realise just how good the move is!
Flexibility is the key... If you just start with #205, and use it as you've used other finishing polishes, you will likely find it a bit mediocre... good, pleasing to use, but nothing special. But #205 is not plug and play. It needs to be learned and you need to invest time and learn to change your techniques a little to really get the best out of what it has to offer. This not only applies to varying the pad to vary the cut, but also varying pressures and speeds midset to achieve the results you are looking for.
I have personally found that for finishing the best techniques are to spread the polish at slow speed, and then at moderate speeds of around 1500 - 1800rpm, work with medium pressure over the rotary head. This medium pressure allows for correction, removal of hazing and working of the abrasives... For finishing, I reduce the speed to 900 - 1200rpm and reduce the pressure to very light, this reduces the cut from the abrasives and transforms to polish from lightly correcting to burnishing. Working times vary from paint to paint, and it is best to experiment a little and learn what will achieve the best possible finish.
The beauty of this polish at this stage was becoming obvious for me - forget it being a pour on the pad and off you go polish. No way. There is much more to #205 than this! If you are willing to put in some time learning and manipulating your technique you can really reap rewards from #205 in terms of working flexibility from a single polish, that has left me feeling fundamental limitations to products using diminshing abrasives. Yes you can vary your technique with these too, but there's a finite working time, and finite level of cut that just reduces your full potential with the products - its a bit like a sports car with the traction control stuck on, you get a great finish automatically, but given a bit more freedom you can do just very slightly better. This is how #205 has left me feeling in practice.
Results
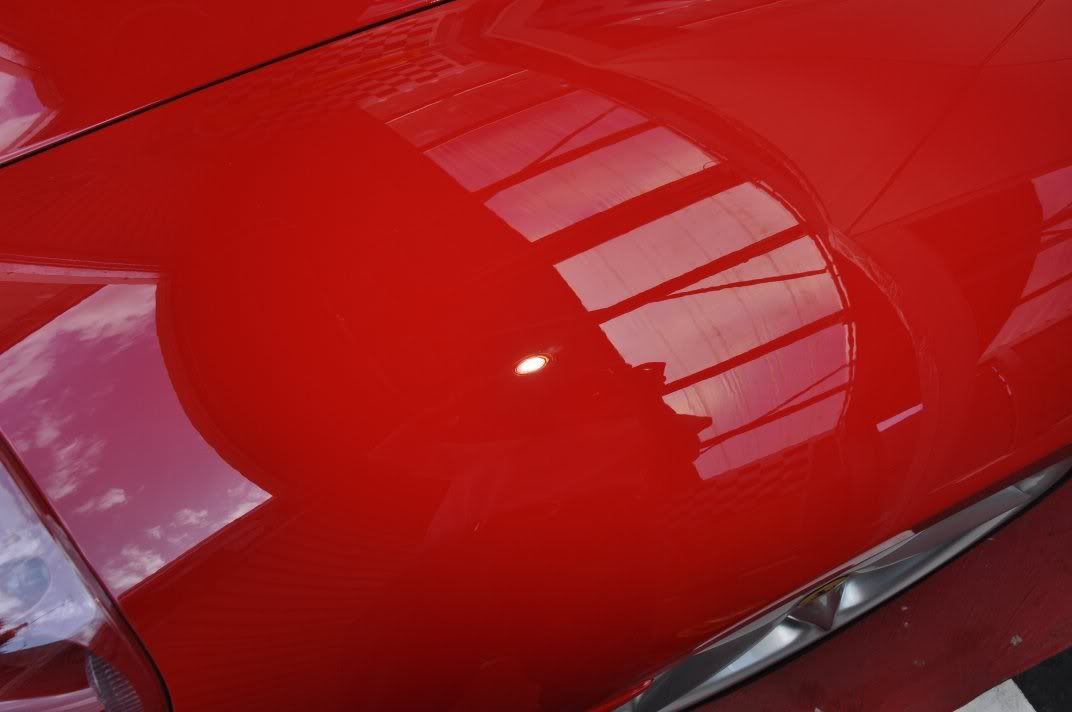
Enough talk... lets let the piccies do the speaking now. First of all, a couple of direct sunlight pictures, showing the clarity achieved from #205 used as a finishing polish on details - both cases applied as discussed above, medium then light pressure to burnish the finish:
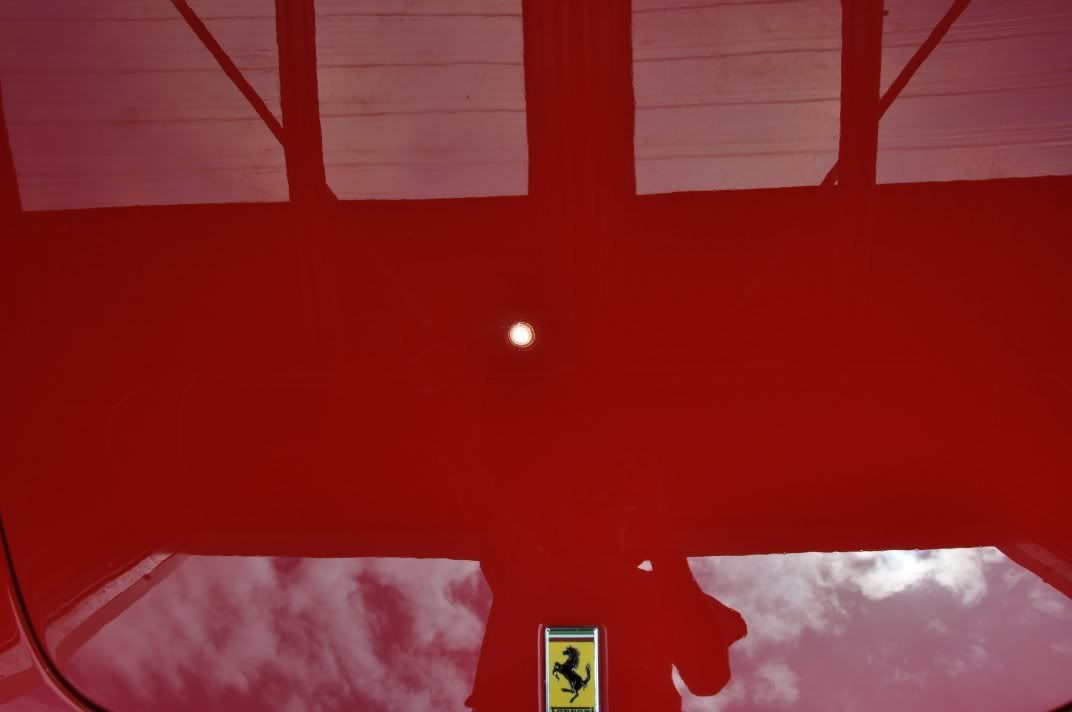
On soft paint (Ford above) and more medium hardness paint (Ferrari below), the clairty achieved by learning the polish and the paint was hugely impressive for me.
Some examples of the polish finish under the Sun Gun on recent details where I have used #205 as the finishing polish:
When assessing the clarity of the finish, look at the metallic flake ping (sealants dont achieve this, a properly burnished finish does
), and the detail of the light sources in that you can not only see no swirls, the reflection is good to the point you can see the detail of the Sun Gun / Camera Flash 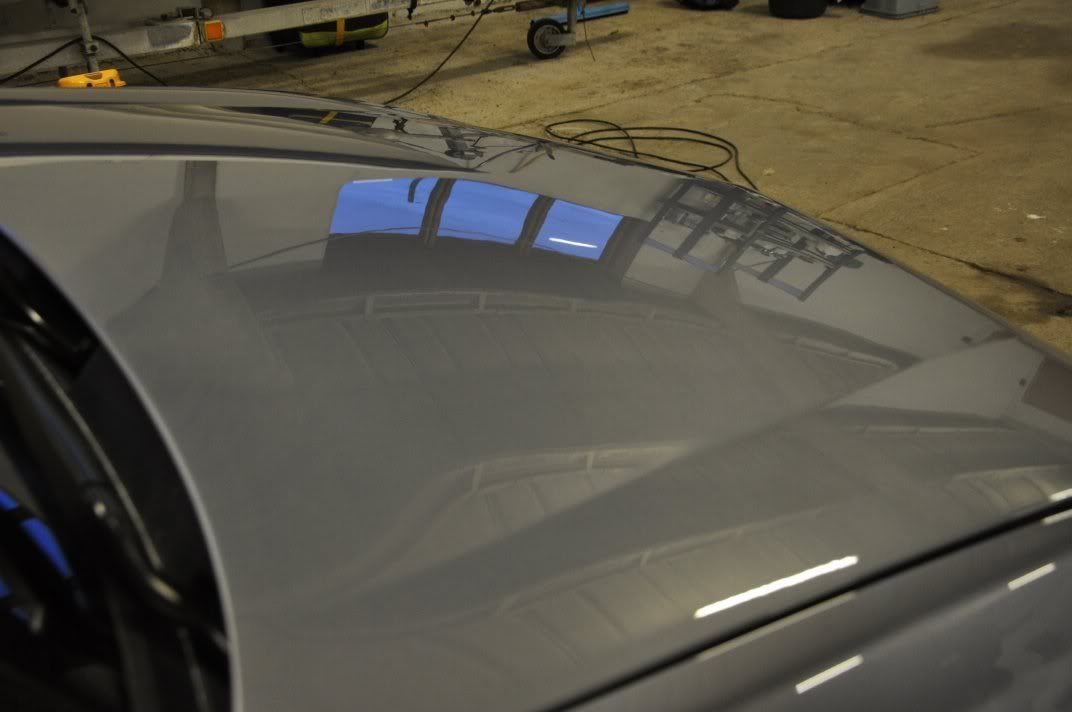


 Guess Meguiar's is still improving those polishing oils of theirs, that's really impressive.