David Fermani
Forza Auto Salon
I received a call from this client’s property manager after he noticed a disgusting mold contamination on the inside of this 1979 Mercedes 450SL. He tried having it cleaned by a local car-washer and not only was the results terrible, but the mold returned after a few weeks! I tried asking as many questions as possible to diagnosis the cause & origin of the contamination so I could plan ahead and create a game plan that would effectively tackle the project. The owner had no idea what this problem was caused from and/or how it got there. He explained that the vehicle was never involved in a flood and has never noticed any water inside at any time. The vehicle is parked at the owner’s vacation water front condo in Los Olas (FT. Lauderdale) inside their parking structure.

This environment (dark & wet) is key for the development of a mold growth and if not properly treated, could literally destroy the interior of a vehicle at the same time infecting the health of its occupants. At 1st I researched multiple products that are designed for the removal of mold on leather. I also consulted several forum members (Grouse ~ Aaron @ 3LG) and he recommended cleaning the vehicle’s leather with products from Leather Master. I then called Phil from Detailer’s Domain and he put me in contact with Multimaster of North America (reseller of LeatherMaster). They specialize in all facets of cleaning, repairing and protecting leather as well as other surfaces including fabrics & wood. Many of their products of imported from Italy. I was instructed to 1st clean the leather and then treat with Mold Killer to prevent its return.

Upon 1st inspection, I noticed a medium growth of mold spores contained mostly to the leather seats, armrest and steering wheel. There was also a slight dusty film of mold on the door trim panels and carpets.


I 1st removed all possible carpet assemblies and removable trim pieces such as the package tray. At this point, I have no idea what created this mold problem and continued to search for signs of evidence. I began cleaning the seats with LeatherMaster’s Rapid Cleaner S. This product is recommended to be dispensed in a special foamer type sprayer nozzle and gets applied to a foam style sponge. To my surprise, this product safely & immediately removed the surface mold and cleaned the leather surfaces too.

Here’s what the sponge water looked like after cleaning the leather:

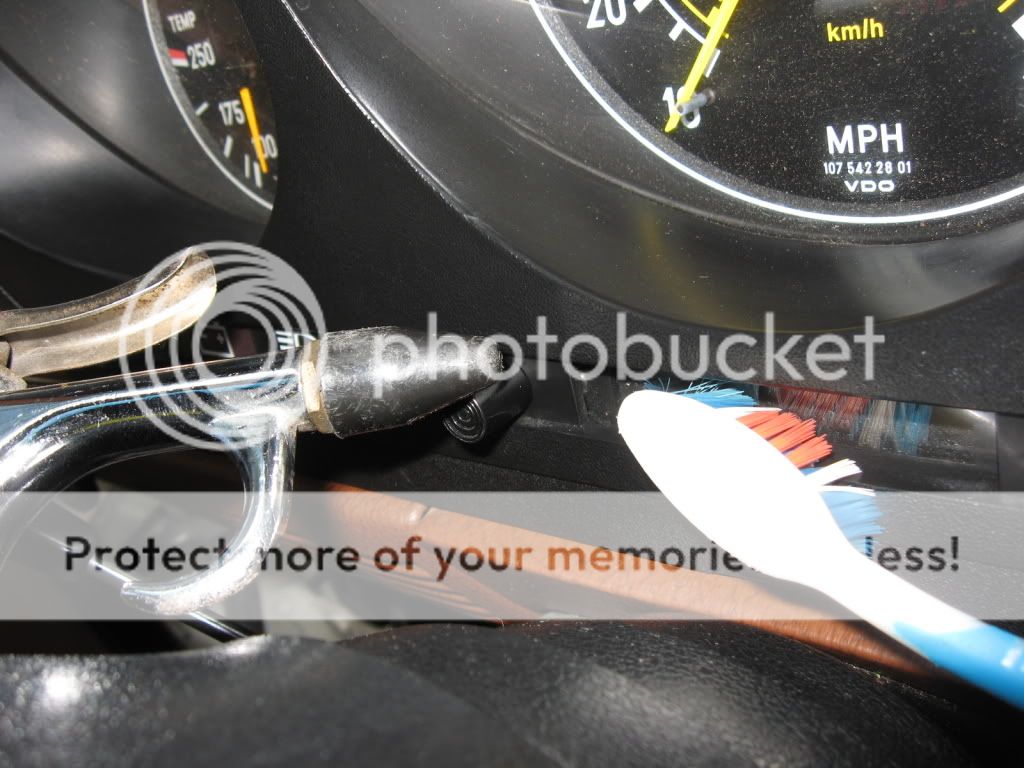
Leather/vinyl trim panels were also cleaned with Rapid S and all other panels were scrubbed clean via toothbrush with Auto Magic Special Cleaner.


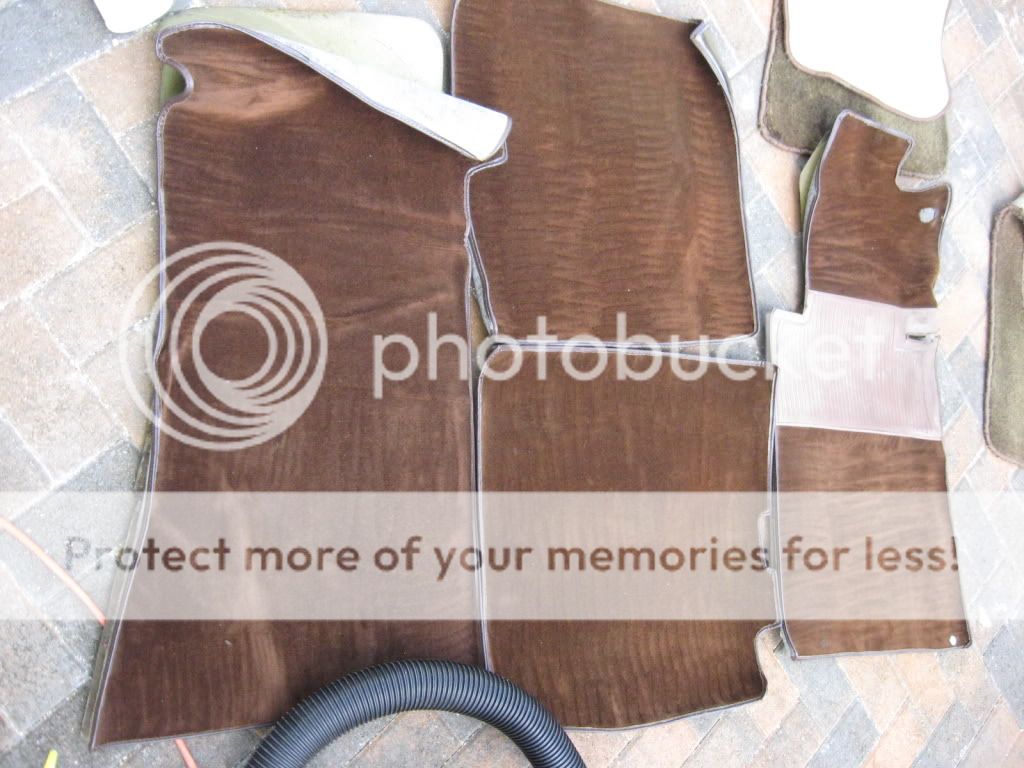
Carpets/Floor mats received a series of cleaning procedures that I’ve documented below:
Each panel was dry scrubbed with a stiff brush. This looses up the debris and allows for a more effective cleaning. It also stands up the nape of the fabric because the deeply embedded debris gets loosened to clean deep into the piling strands of fabric.


Next, the surface is vacuumed:

Next the surface is blown out with compressed air to loosen up even more ground in debris:


**These 2 steps alone are key for proper cleaning and can actually make or break certain fabric cleaning applications. It allows the ground in dirt & debris to be lifted away instead of buried in deeper while wet cleaning. It is essential to perform these 2 steps prior to getting any of the surfaces wet. **
Next, all surfaces were pre-soaked & scrubbed with Auto Magic Enzyme Pre-Spot. This eats away and kills the bacteria in the fabric.


Next I prepared a bucket mixed with 1 gallon of water and Auto Magic EZ-Clean HD shampoo & Mark-V’s Breeze Odor Eliminator.

This was foamed up by sticking my compressed air nozzle in the bucket and then applied via Grout Sponge. Each floor matt was cleaned individually to prevent over saturation of the surface. I then scrubbed the foam into the fabric. The foam creates and allows the dirt to lift up and out.


Next, I slowly vacuumed each surface:


Next, all the remaining wetness, soiling & chemicals were toweled out:

This environment (dark & wet) is key for the development of a mold growth and if not properly treated, could literally destroy the interior of a vehicle at the same time infecting the health of its occupants. At 1st I researched multiple products that are designed for the removal of mold on leather. I also consulted several forum members (Grouse ~ Aaron @ 3LG) and he recommended cleaning the vehicle’s leather with products from Leather Master. I then called Phil from Detailer’s Domain and he put me in contact with Multimaster of North America (reseller of LeatherMaster). They specialize in all facets of cleaning, repairing and protecting leather as well as other surfaces including fabrics & wood. Many of their products of imported from Italy. I was instructed to 1st clean the leather and then treat with Mold Killer to prevent its return.
Upon 1st inspection, I noticed a medium growth of mold spores contained mostly to the leather seats, armrest and steering wheel. There was also a slight dusty film of mold on the door trim panels and carpets.
I 1st removed all possible carpet assemblies and removable trim pieces such as the package tray. At this point, I have no idea what created this mold problem and continued to search for signs of evidence. I began cleaning the seats with LeatherMaster’s Rapid Cleaner S. This product is recommended to be dispensed in a special foamer type sprayer nozzle and gets applied to a foam style sponge. To my surprise, this product safely & immediately removed the surface mold and cleaned the leather surfaces too.
Here’s what the sponge water looked like after cleaning the leather:
Leather/vinyl trim panels were also cleaned with Rapid S and all other panels were scrubbed clean via toothbrush with Auto Magic Special Cleaner.
Carpets/Floor mats received a series of cleaning procedures that I’ve documented below:
Each panel was dry scrubbed with a stiff brush. This looses up the debris and allows for a more effective cleaning. It also stands up the nape of the fabric because the deeply embedded debris gets loosened to clean deep into the piling strands of fabric.
Next, the surface is vacuumed:
Next the surface is blown out with compressed air to loosen up even more ground in debris:
**These 2 steps alone are key for proper cleaning and can actually make or break certain fabric cleaning applications. It allows the ground in dirt & debris to be lifted away instead of buried in deeper while wet cleaning. It is essential to perform these 2 steps prior to getting any of the surfaces wet. **
Next, all surfaces were pre-soaked & scrubbed with Auto Magic Enzyme Pre-Spot. This eats away and kills the bacteria in the fabric.
Next I prepared a bucket mixed with 1 gallon of water and Auto Magic EZ-Clean HD shampoo & Mark-V’s Breeze Odor Eliminator.
This was foamed up by sticking my compressed air nozzle in the bucket and then applied via Grout Sponge. Each floor matt was cleaned individually to prevent over saturation of the surface. I then scrubbed the foam into the fabric. The foam creates and allows the dirt to lift up and out.
Next, I slowly vacuumed each surface:
Next, all the remaining wetness, soiling & chemicals were toweled out:


